


The Finishing for Hanging Conundrum
Reflections from one of our weavers, Kati Paakki

We all have our favourite way of finishing our tapestries, but sometimes circumstances require us to think another way. For example, the shape may not be suitable for a hem or extra support is needed for the tapestry to hang well.
This article is not meant to be an exhaustive description of finishing techniques but rather telling our journey on this knotty part of weaving Murmuration.
Every step of the way, we had to plan together how to approach various issues to ensure the cohesiveness of the composition.
Start with finishing in mind
Our finishing of the tapestries started right during the Design Phase because some of the wonderful ideas we had were dismissed due to their impact on transport and hanging. For example, we had many design ideas whereby the tapestries would be connected by additional warp or weft or all the tapestries would be sewn together. The latter idea would have meant someone having to take on the time-consuming task of sewing the tapestries together once theywere together. Also, there was a high likelihood they would have to be separated for transport and sewn together again for the next venue. 3D installations were also rejected for these reasons. Our decision for a modular approach was influenced by hanging and transport issues.
To hem or not to hem?
Before we could begin our tapestries, we needed to decide whether to use hems or something else for securing the warp ends. At this point we were looking for a cohesive look even at the back.
Some of us tested shaped hems using thinner bundle to reduce bulk. Shaped hem means skipping weaving some of the warps ideally creating a triangular gap (think darts) so that the hem could be folded neatly at the back. Once the hem is complete secure the warps with double half hitch knots and weave the waste weave.
Another technique we tested was to turn the warp ends to the back. This meant first securing them either with double half hitch knots or soumak before turning the ends over to the back and securing them by sewing. The half hitch knots or soumak are done after waste weave at the beginning and before the waste weave at the top.
We discussed the options, and as the majority preferred to use the ‘turn warps back’ method, we agreed to use this technique rather than the hems. As there was little visual difference between double half hitch knot and soumak techniques, it was left to the individual weaver to decide which technique to use.
How about hanging?
We needed to consider the following issues:
Which hanging systems are used at the exhibition venues
Size and shape of the tapestries
Transporting the tapestries between venues
Issue 1 - Hanging systems at the venues
We established that the first three venues already booked had the same hanging system, which meant we could sew rings approximately one inch from the top to prevent the hanging hooks showing. Admittedly, we may have to reconsider the ring approach depending on the requirements of the future exhibition venues.
What complicated the issue was that we decided to hang the tapestries from a beam at Farfield Mill, Sedbergh, enabling visitors to see the backs of the tapestries. This meant we had to be particularly careful in ensuring that the tapestries were well supported to hang freely without buckling or flopping.
We also set up a temporary Hanging Team for the photography session who met one weekend to make final preparations on the tapestries for the hanging – this was the very first time the tapestries were together!
Issue 2 - The size and shape of the tapestries
Shaped tapestries need firm support to ensure they hang without flopping and buckling. We spent a lot of time in search for a solution for all until we realised we were trying to fit a square peg in a round hole. Each tapestry had its own particular demands when it came to hanging. The size and steepness of curve dictated how each weaver should approach this. Although the large tapestries had their challenges, the smaller ones weren’t necessarily any easier to finish, eg Katrine West had a particularly steep curve in her small tapestry.
We decided that each weaver should approach the hanging according to the needs of their tapestry, utilising local materials available to them and bearing in mind the transport requirements.
Issue 3 – Transporting tapestries between venues
We also needed to ensure that the solutions used were suitable for transport.
The smaller tapestries could be transported flat, but the larger/wider ones needed to be rolled or gently folded. Because of this we needed carefully consider what material to use and how the backing was applied.
Some of the materials considered were:
Mountboard – cannot roll or fold
Layers of heavy weight iron on Vilene – may have a ‘memory’ when folded or rolled
An armature with thin aluminium or sculpting wire – needs removing after exhibition for transport as it will not roll or fold
Expamet sheet – flexible but how would the metal react with the weft?
Plexiglass – cannot roll or fold
Pelmet Vilene or Pellon – may have a ‘memory’ after folding or rolling.
Some of the approaches
[All images of fronts of tapestries by Joanne Withers. All images of tapestry backs by the weaver]
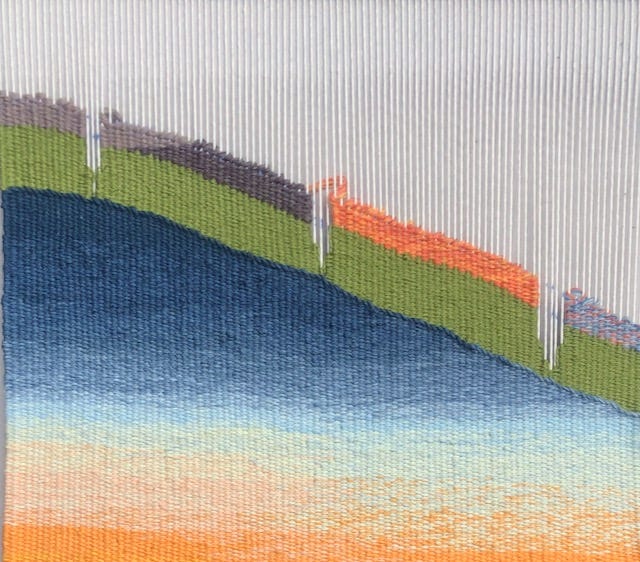
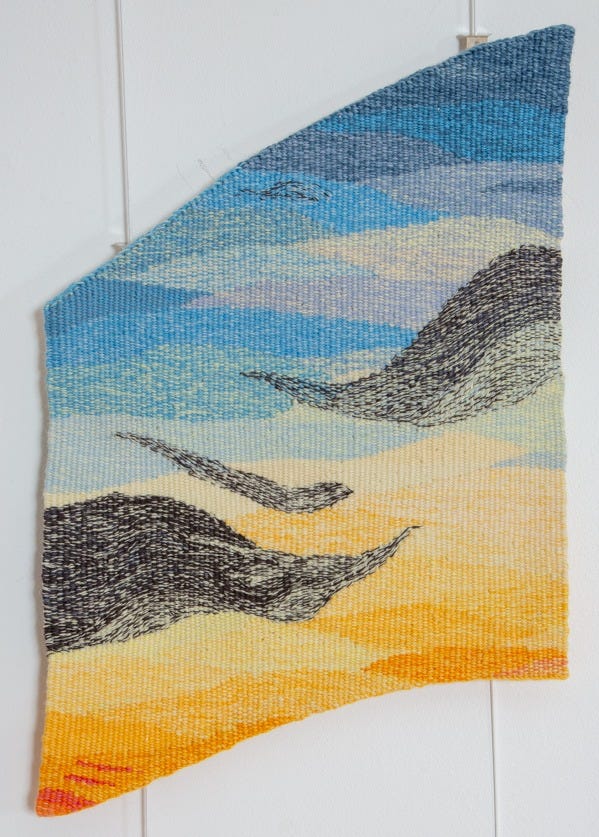
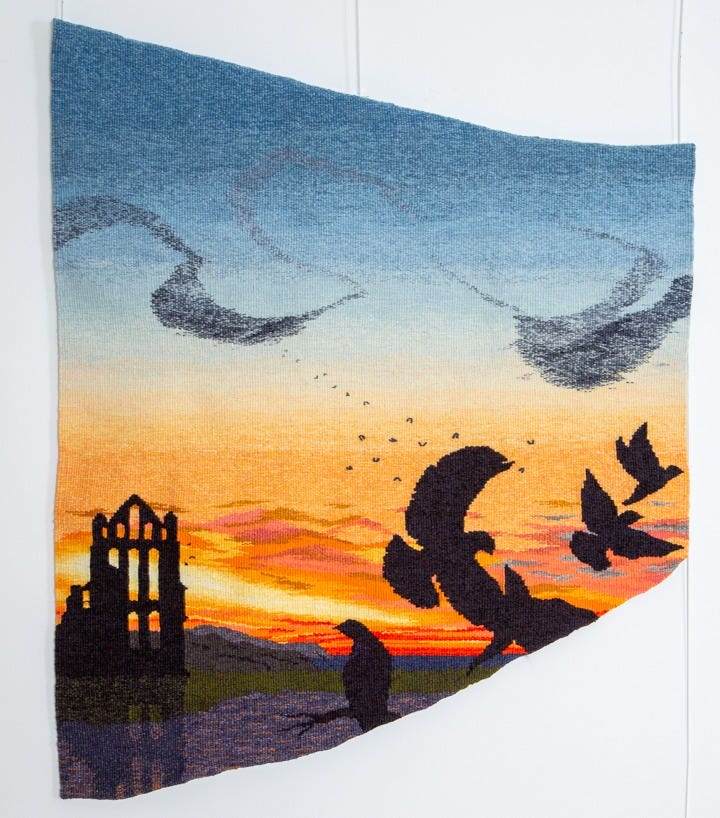
MINNA ROTHMAN’s tapestry is one of the largest in the composition (widest part 80cm, tallest part 95 cm).
After lining her tapestry, Minna used pelmet Vilene strip across the top. Because her tapestry has a very narrow tip at the bottom, she also attached a piece of lining with three strips of Vilene which is secured to the tapestry only along the top edge. Just hanging freely behind the tapestry created sturdy enough backing to prevent the tip curling. Applying Vilene in horizontal strips with some space between allows rolling the tapestry up for transport.
Although KATRINE WEST’s tapestry is one of the smaller ones (widest part 45 cm, tallest part 39 cm), it had its own challenges due to the steepness of the curve.

Katrine used Balear Ultra Heavy Fusible Vilene to stiffen the top of her tapestry for hanging. She cut it to the shape of the top of the back of the tapestry (about 3-4 inches wide) and then ironed it onto some pale blue cotton material. Katrine cut the material about one inch larger than the piece of Vilene, folded the edges over to the other side and sewed round with a sewing machine to keep it neatly on the Vilene.
She then sewed three plastic rings onto this on the material side but sewing through the Vilene to hold them firmly in place for hanging. The rings were placed close to the top (but not overhanging the top) with one ring at each end and one in the middle. Sewing through the Vilene is quite difficult so is best done before sewing to the tapestry.
Katrine then sewed the covered Vilene to the top of the tapestry and down the sides. She did not secure the bottom of the backing to ensure easy access to the back in case the position of the rings needed to be altered by the Hanging Team.
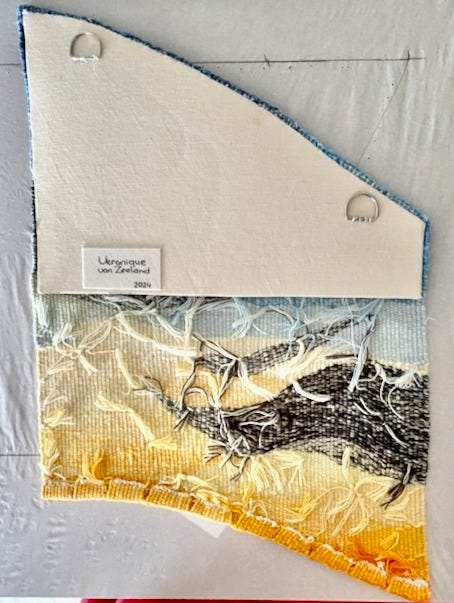
VERONIQUE VAN ZEELAND took a different approach again (widest part 30 cm, tallest part 40 cm).
Once she had secured the warp, she added a thick layer of Vlieseline interfacing, which she had first adhered to a piece of thin cotton fabric. This was then secured to the tapestry. After this Veronique attached two D-rings along the top edge to accommodate the hanging systems at the known venues. In hindsight, Veronique felt it would have been way easier to attach the rings before sewing the interfacing to the back, as it required quite a bit of fiddling afterward.
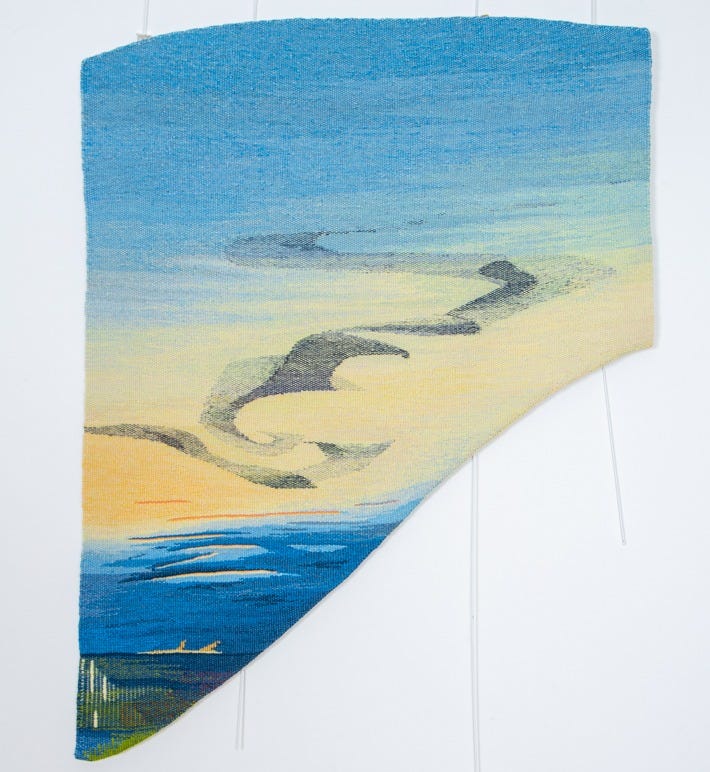
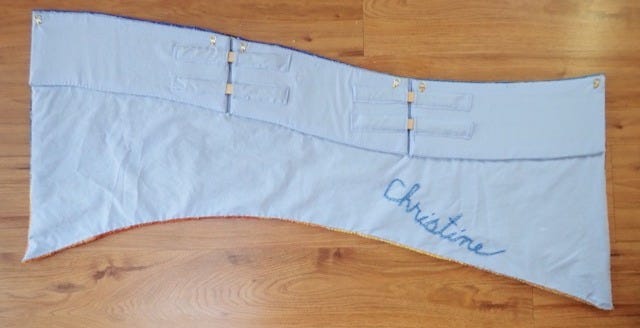
CHRISTINE RIVERS’ tapestry is by far the widest (widest part 120 cm, tallest part 55 cm) which resulted in an ingenious solution for transport by Christine.

Due to the width of her tapestry, Christine didn’t think that the fabric stiffener that some of the other weavers were using would work on her tapestry. Instead, she used three shaped pieces of 3/8 inch (1 cm) thick board so that the tapestry could be folded during transport.
After lining her tapestry Christine attached fabric to one side of the shaped pieces of board with fabric glue. Before sewing fabric on the other sides, she created sleeves for narrow wooden slats that would, when in place, stop the joins folding and ensure the tapestry hanging straight.
Once the shaped pieces of board were covered and the sleeves for the slats created, Christine sewed the three pieces to the lining of the tapestry and attached D-rings on each side of the three sections.
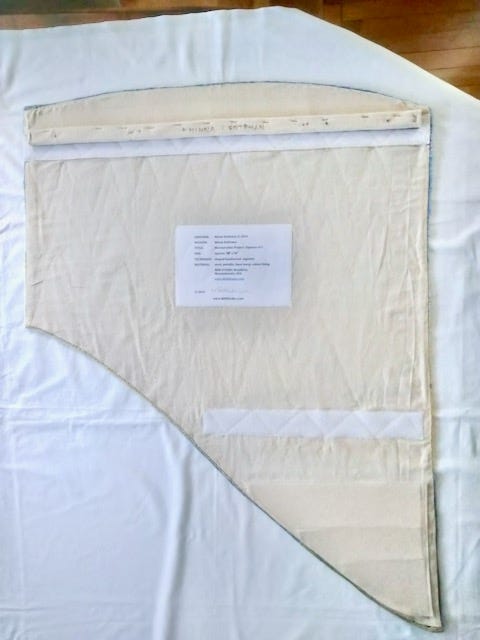
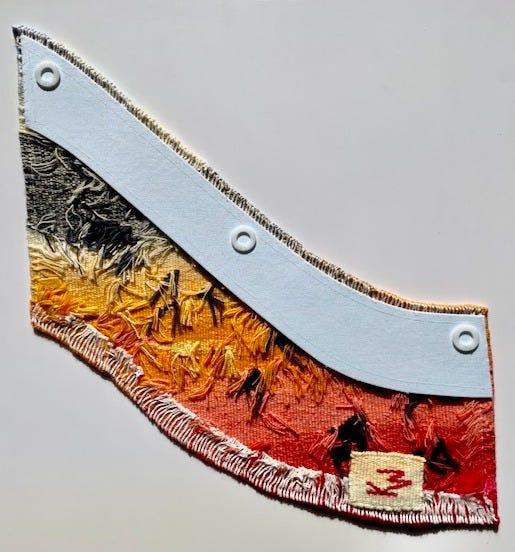
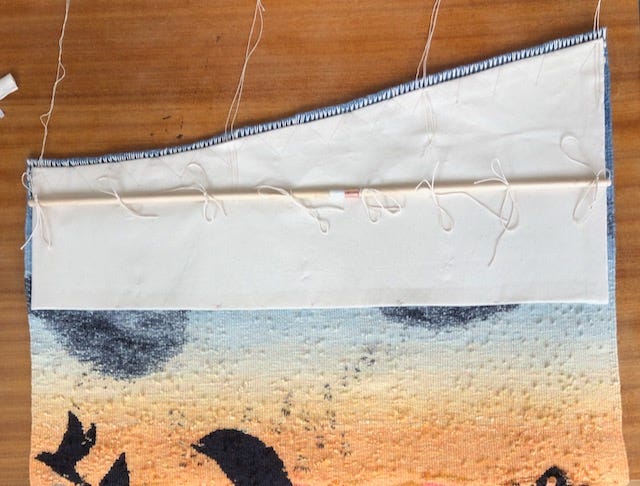
Although KATI PAAKKI’s tapestry has the same measurements as Minna’s (widest part 80 cm, tallest part 95 cm), it had different challenges due to its shape.
Kati opted not to use pelmet Vilene because during assessing the material for rolling or gently folding it had a ‘memory’ that created a fold. Instead, she decided to use several layers of heavy interfacing at the top as the curve was very gentle.
Kati made a pattern of the top of her tapestry and then cut calico with a one inch seam allowance. She then cut four layers of heavy interfacing without the seam allowance and then ironed the layers one by one to the calico. Kati turned the seam allowance over to the reverse side and secured it using Wundaweb hemming tape.
The stiffened lining was then sewn to the tapestry at the top and the sides. She also added some loose stitches to the bottom.
To ensure the tapestry would hang straight Kati added a dowel to the back. She tried attaching the dowel with some rings first, but the dowel ended up being too loose and in danger of coming off. Kati then knotted the dowel to the stiffened lining with weft, which gave very firm support for the tapestry. As there was a chance that the tapestry would have to be gently folded during transport, Kati split the dowel in two and inserted a copper tube in the middle into which the ends of the two dowels could be inserted.
Kati didn’t add the rings at the time she finished her tapestry as she was part of the ‘Hanging Team’ and could insert them during the photography weekend.
Did we get it right?
Yes, I think we did. It took a lot of discussion and experimenting during which time we shared and learned a lot about finishing. The Hanging Team for the photography session had to make only minor adjustments to the positioning of some of the rings to ensure the tapestries hang well.
I hope this article has been of interest and useful in case you, the reader, plan to weave shaped tapestries.
Thanks for this wonderful insight into the scary world of finishing and backing for hanging. It will be a very useful resource in the coming weeks 😉.
I only saw the work in Shetland so it is also fascinating to see some of the backs. Neat and ingenious although mention of copper tubing caused a moment of concern about possible blue staining in prolonged contact...
Great article! Thank you!