


Sampling for Murmuration
Reflections from one of our weavers, Kati Paakki

Love it or hate it, sampling is an essential part of weaving unless you’re one of the few who can just dive in and weave.
To many it may feel like a necessary chore, but I feel excited to begin a sampler. It is like starting on the first blank page of a new notebook (notebook hoarders anyone?). I’m always keen to begin sampling after the design and planning phases are done. What will I discover? My fingers are happy to pick the warp and begin my next tapestry journey. As with most journeys you will need to pack; sampling helps me to decide what goes in my suitcase.
Sampling is more of a guide to the right direction than a definitive answer to what should be. To paraphrase a fellow ‘Murmurator’ - the great veteran weaver Joan Baxter - sampling more often than not will show what doesn’t work. I try to make my samplers fairly wide/large because colours can react differently on a larger scale. I’m always prepared to respond to that when it happens on the loom.
Sampling isn’t always just about the colours and the techniques. Sometimes testing out shapes is needed, especially 3D shapes, as you will find out from Christine’s sampling. Below are some of our sampling experiences, or as in Anna’s case, not sampling experience.
Anna’s sampling - or non-sampling - experience
One advantage of being one of the last, if not the last person to start weaving, meant that all the others had been sampling on my behalf! I had the benefit of seeing and hearing (via our regular Zoom sessions) what the others had got up to, what they had tried and also what they had rejected. I am also a weaver who likes to allow my tapestries to evolve on the loom, solving problems and developing approaches as I go. I’m happy to unweave if necessary, but not so much so that I will take out more than a day’s weaving - unless something really has gone drastically wrong!
I had some ideas for techniques I’d like to use in certain areas of the tapestry, such as the pick and pick in the reedbed or marsh area. I’d explored using that in other tapestries, so knew what I was trying to achieve and adapted my approach as I wove. I also had in mind how I wanted to link Minna’s dark sky on my right through to Jenny’s clear skies to my left. That had to be tested out as I wove, and was definitely one of the areas I tweaked, but I was happy with the result. As for the murmuration, I had an idea for the shape and explored some marks using charcoal to see how it might look in practice to get the effect I wanted. After that it was a case of responding to what I had woven previously, including taking daily photos and printing out and sticking sections I’d already woven together so I could see what was disappearing round the bottom beam of my loom!
As for colour choices, Jenny and Minna had kept records of their colour blends, which I then used as my guide. For example, Minna had used shades of Weaversbazaar teal in the bluer sections while Jenny had not, so I used teal in the blends to the right side where my section was meeting Minna’s, and left it out to the left. Minna had also used an inlay technique for her Murmuration, which I experimented with where my murmuration flowed into hers. I also took ideas from Christine and Veronique, weaving shapes of colour rather than creating smooth blends such as in Kennita’s section. All of the work done by the others meant I had options to choose from for techniques, constraints for colours and my murmuration, but consequently the weaving of this section could flow on the loom.
Irene’s sampling experience
The value of sampling for me showed me both what I wouldn’t do, as well as what I would do. I’m unused to working with a colour palette set out for me, so it was helpful to do one sample where I tried out the core and secondary yarns. With this, I could see how the yarn colours worked together and whether they fitted with the design idea that I had in mind, and also it was good to see how the bundles felt to weave with. The results were positive!
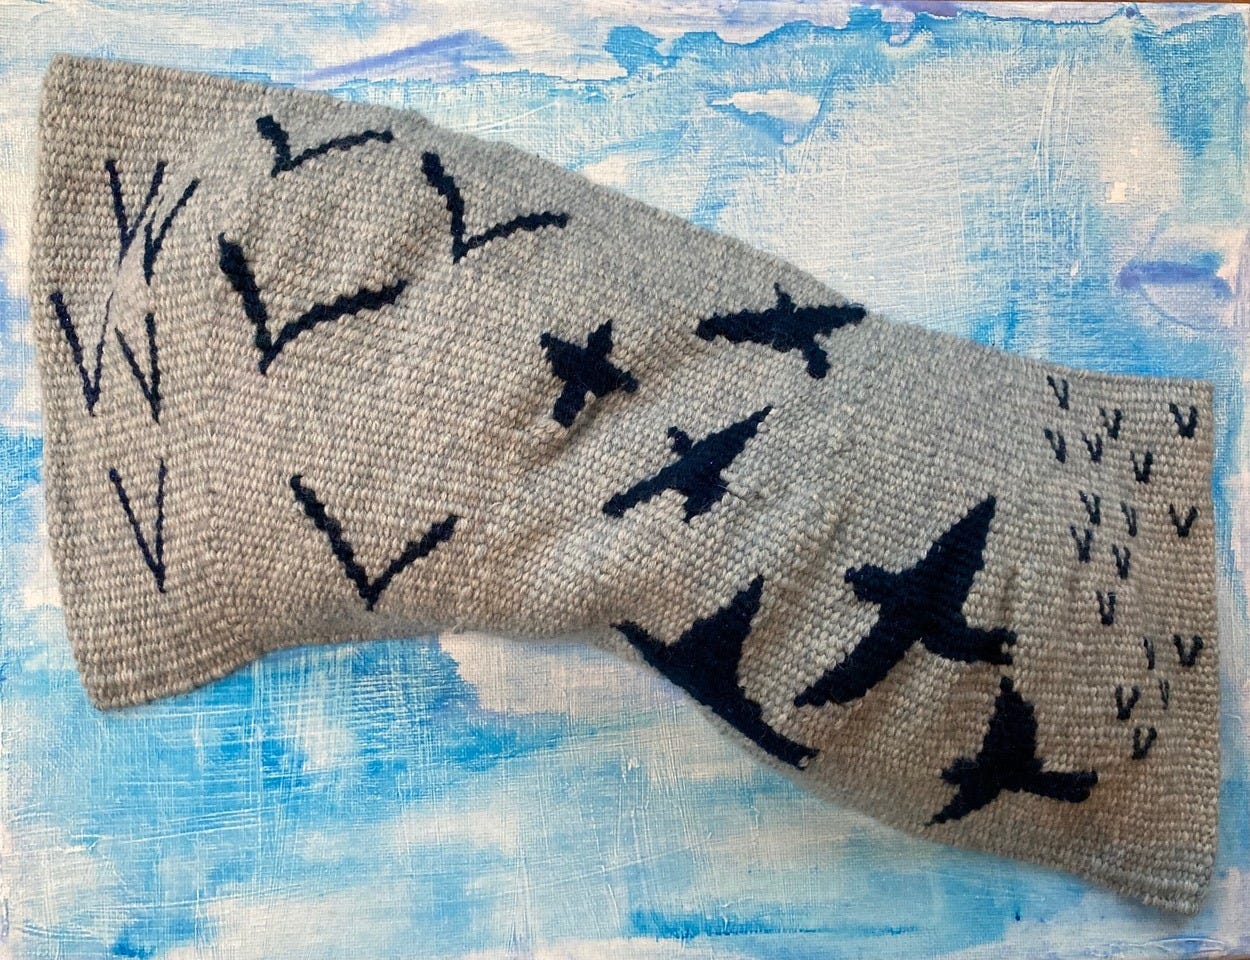
The other important sample for me was where I tried weaving birds, as I had an idea where there would be barely visible individual birds to the sides of the main murmuration. I wanted to see what happened if I used the same yarn bundle as the main tapestry, but woven eccentrically and including some of the ‘bling’ yarn that we used for the Waterline tapestries (I liked the idea that I could have just a small element of continuity across the two projects). However, this idea didn’t work for two reasons: for the eccentric weave to be visible, the bird had to be larger than looked right in the design; and with a shape that worked in eccentric weave, it ended up looking like a seagull. So that sample showed me what I wouldn’t be doing!
Christine’s sampling experience
We had lots of wild ideas when we were beginning our talks of designs for Murmuration. I tried mocking up paper shapes that would be 3D weavings.
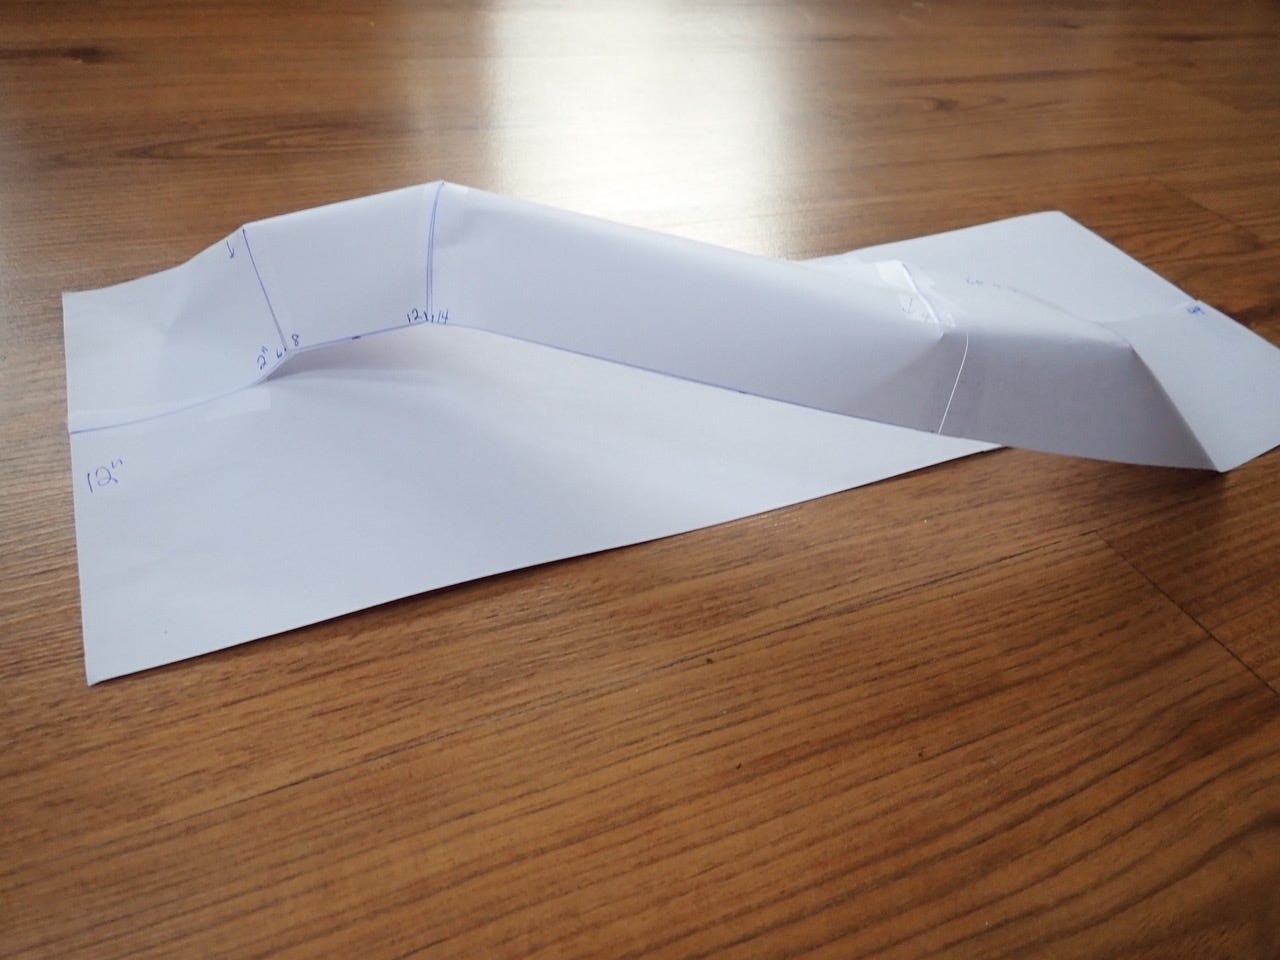
The first was a base weaving and the murmuration on a separate weaving that would float above the base. Maybe woven with spaces to be pulled together to make the flying piece curve. This sample proved to be too complicated. An idea that didn’t work.
Another paper sample I tried was a base weaving of the sky and another woven piece that would be flipped over. That would require perfect weaving on the front and the back of the tapestry so that wasn’t going to work!
I moved on to woven samples. I wove some birds, trying out different shapes to represent birds. I left darts of unwoven areas to be pulled together to make the weaving shaped.
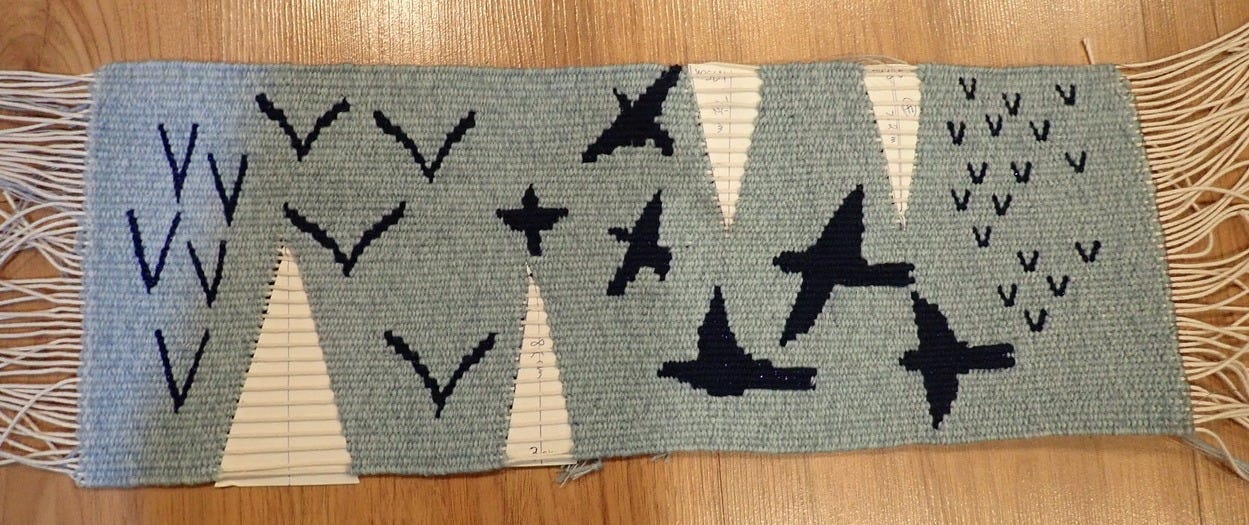
It worked, but it would have been lumpy and awkward to display. I mounted the sample on a painted canvas and stuffed it with fibrefill stuffing but keeping the shape would be difficult. Another idea that wouldn’t work for the whole group.
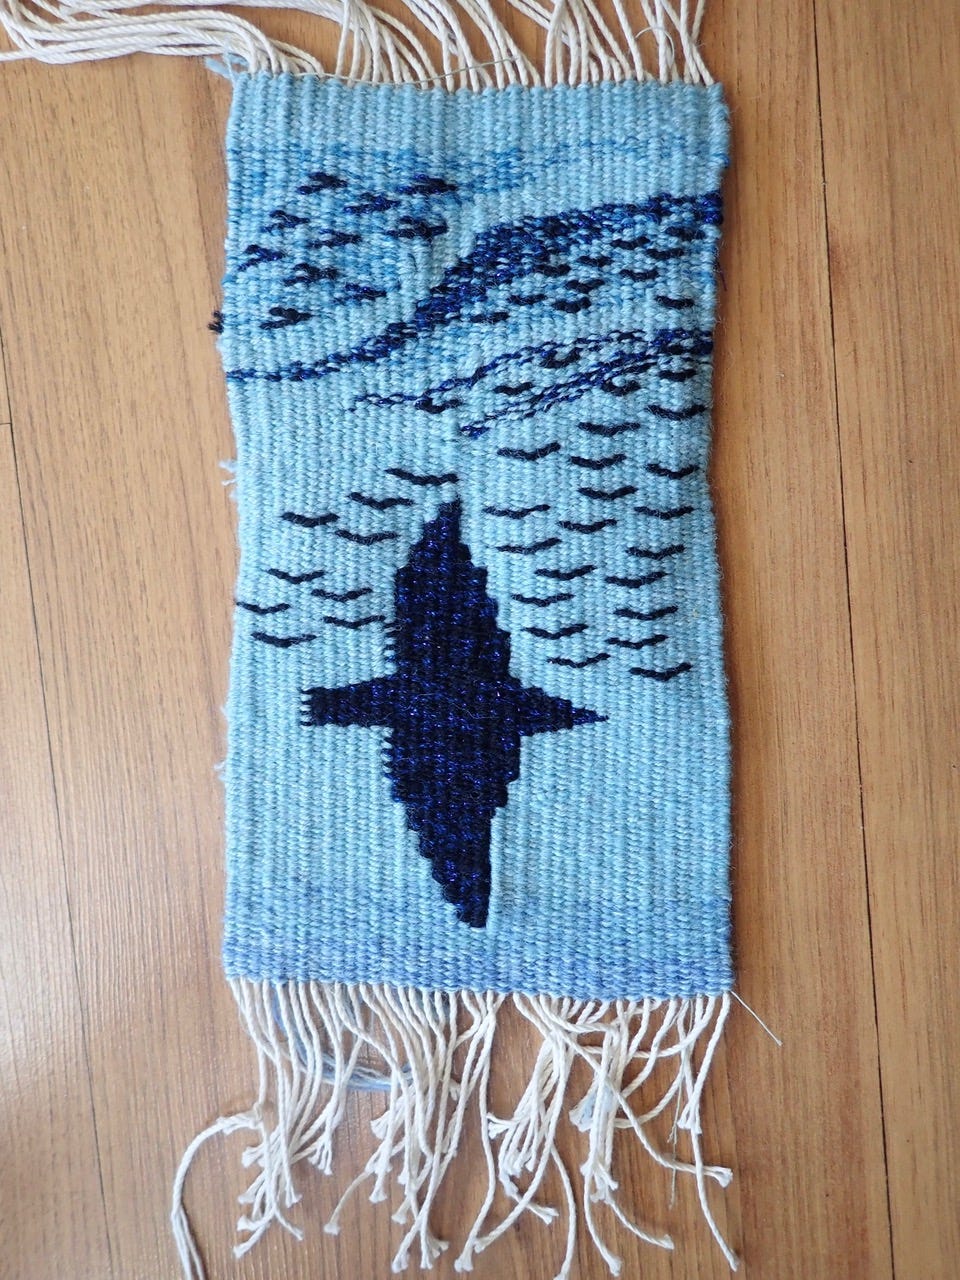
I wove samples for my own piece too. I started with trying to weave a whole bird, which I did end up using in my tapestry. I tried little V shapes with one thread covered in one pass and the two above in the next pass to make a shallow V. I used this a lot in my tapestry. I did some horizontal V shapes and didn’t end up using them in my tapestry but they could have worked. I wove an area of darker colour to represent the thicker area of the murmuration. That worked. This sample gave me ideas of how to weave the birds, bird symbols and murmuration areas of my tapestry.
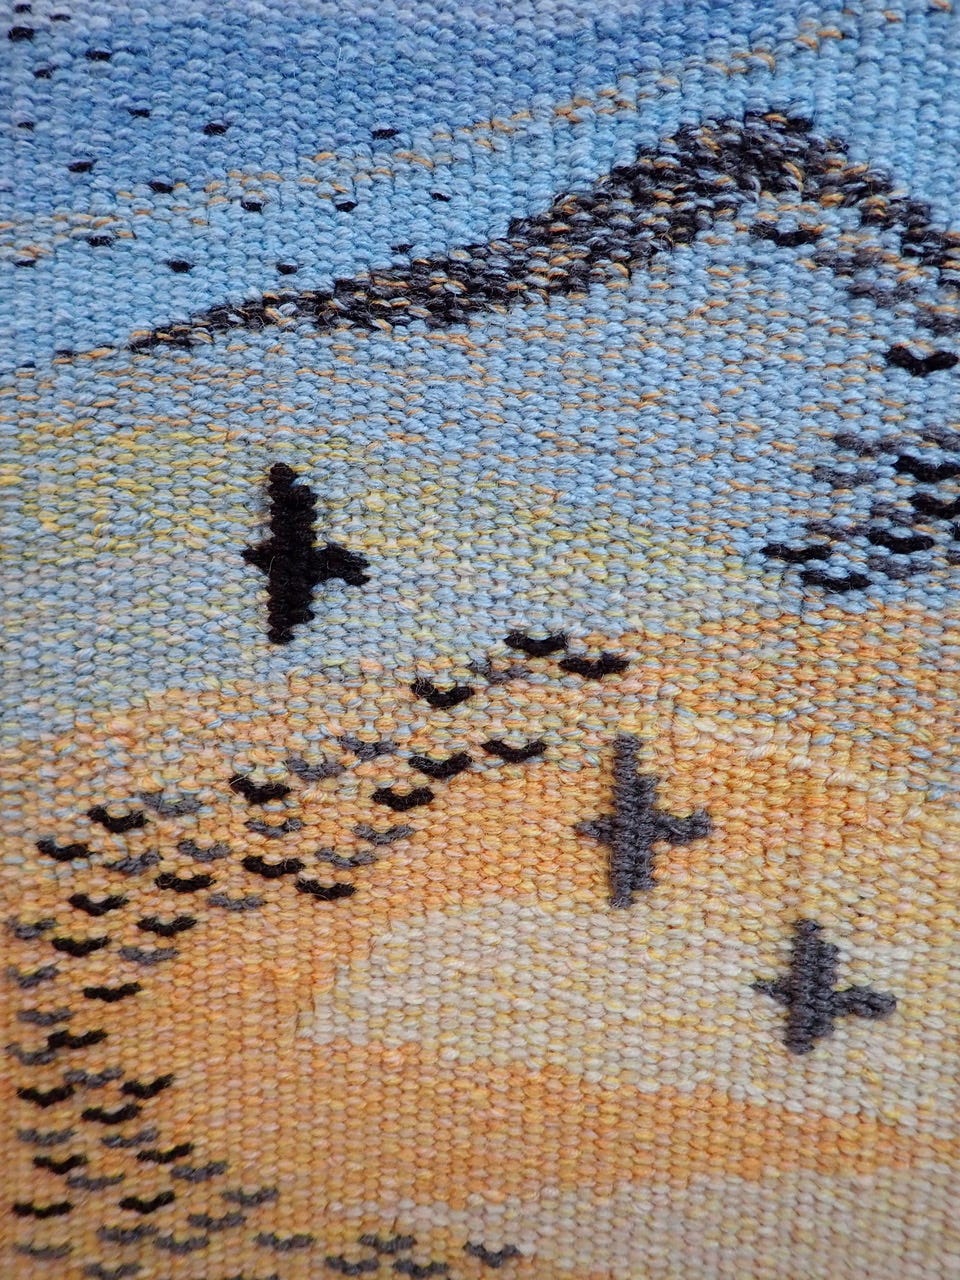
And finally I sampled the whole idea that I wanted in the tapestry. I wove trees at the bottom because I wanted some ground to give the flying birds some reference. I liked the idea but my trees were so small that they are like stiff sticks.
I wove the little V shapes to represent the birds flying far away and I think that worked. I used that a lot in my tapestry. I wove some bigger birds that look more like stiff airplanes but the idea was to have bigger birds with the small ones. On my bigger tapestry, the bigger birds could be woven on an angle and with wings going in different directions so that they looked more real. I liked the experimenting with sky colours in this sample and used some of that in my tapestry.
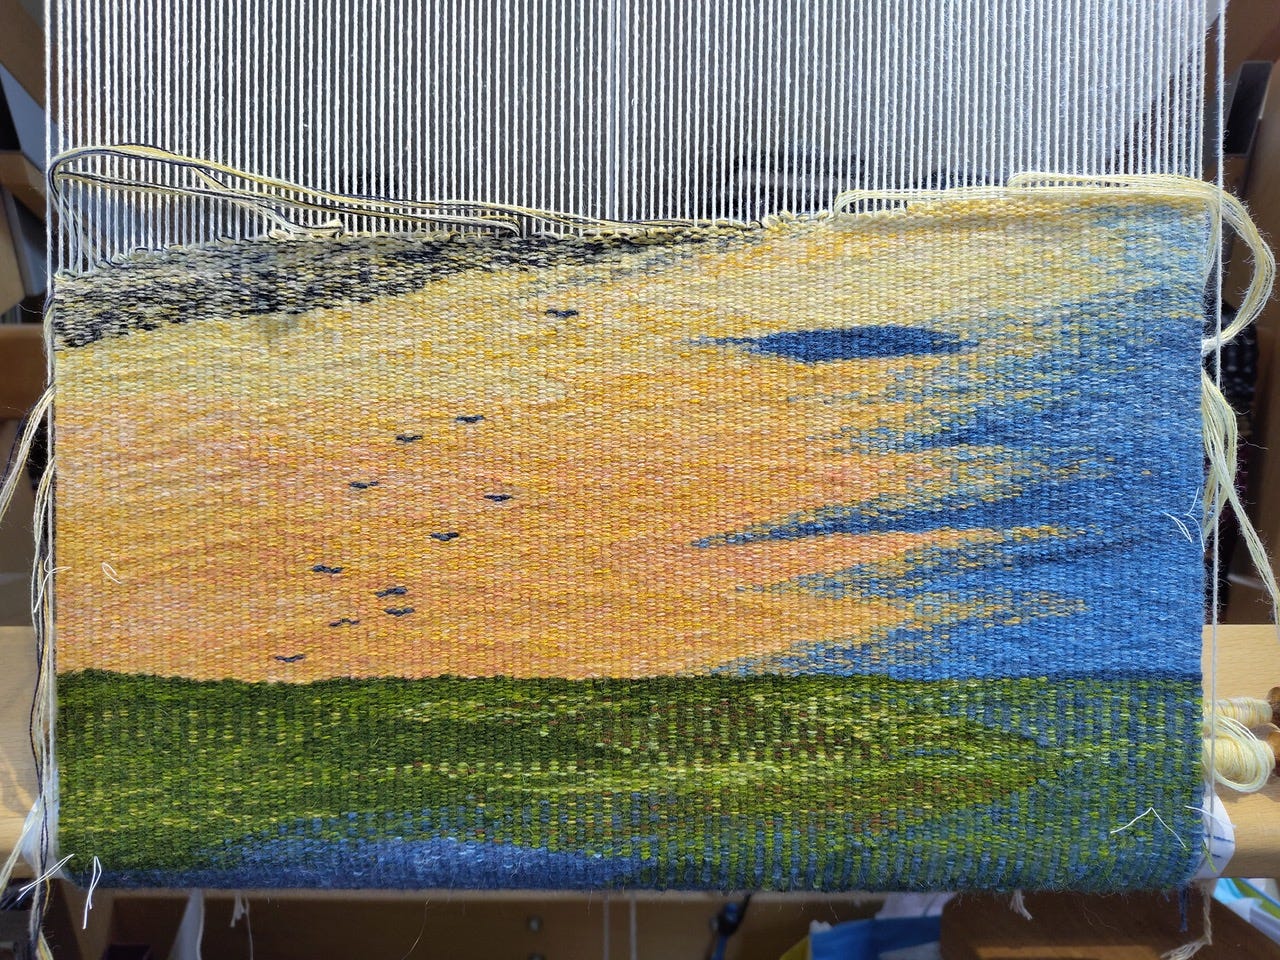
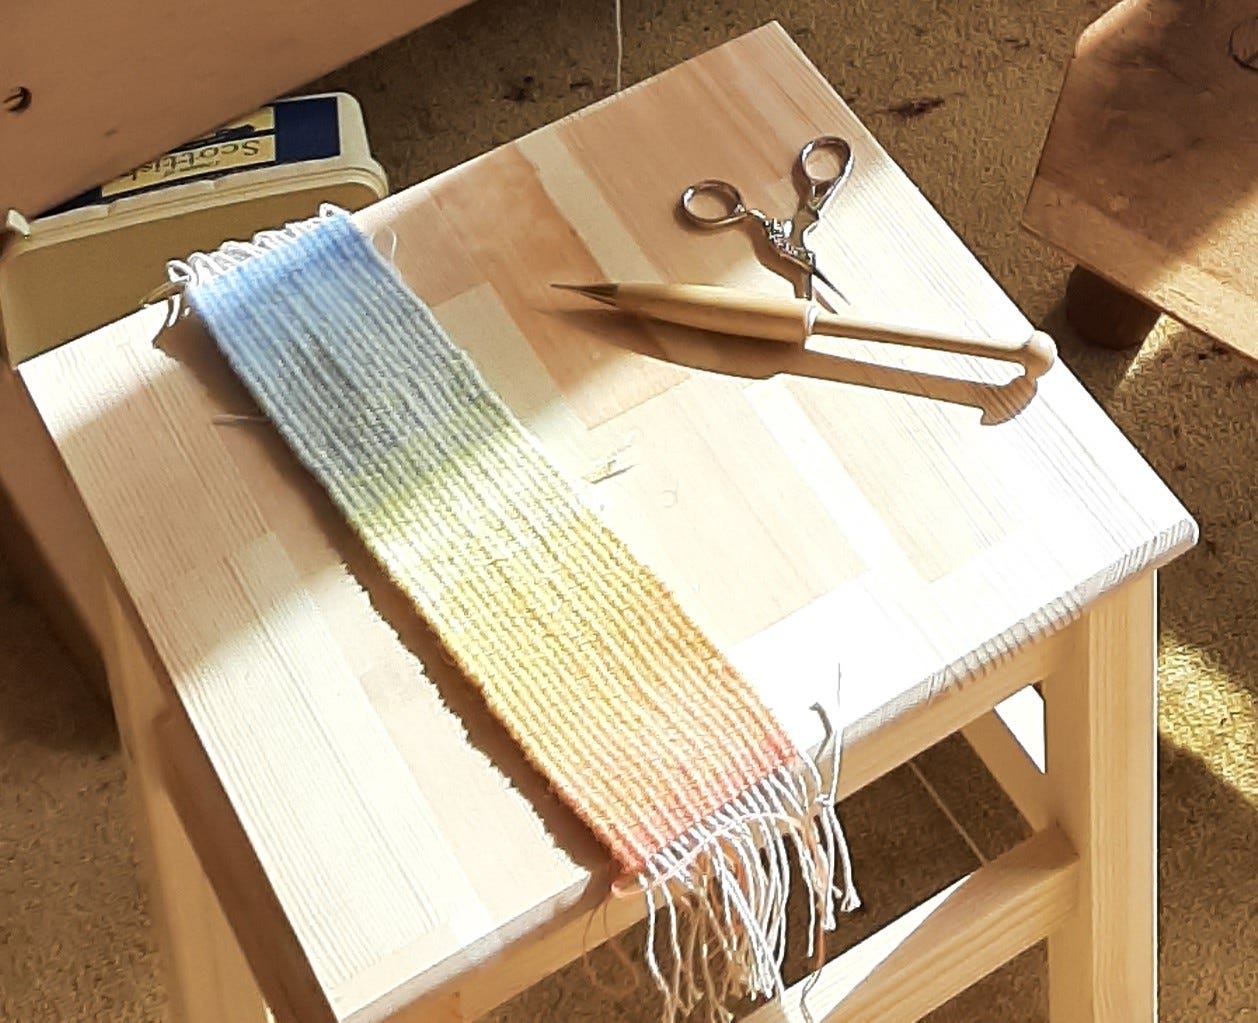
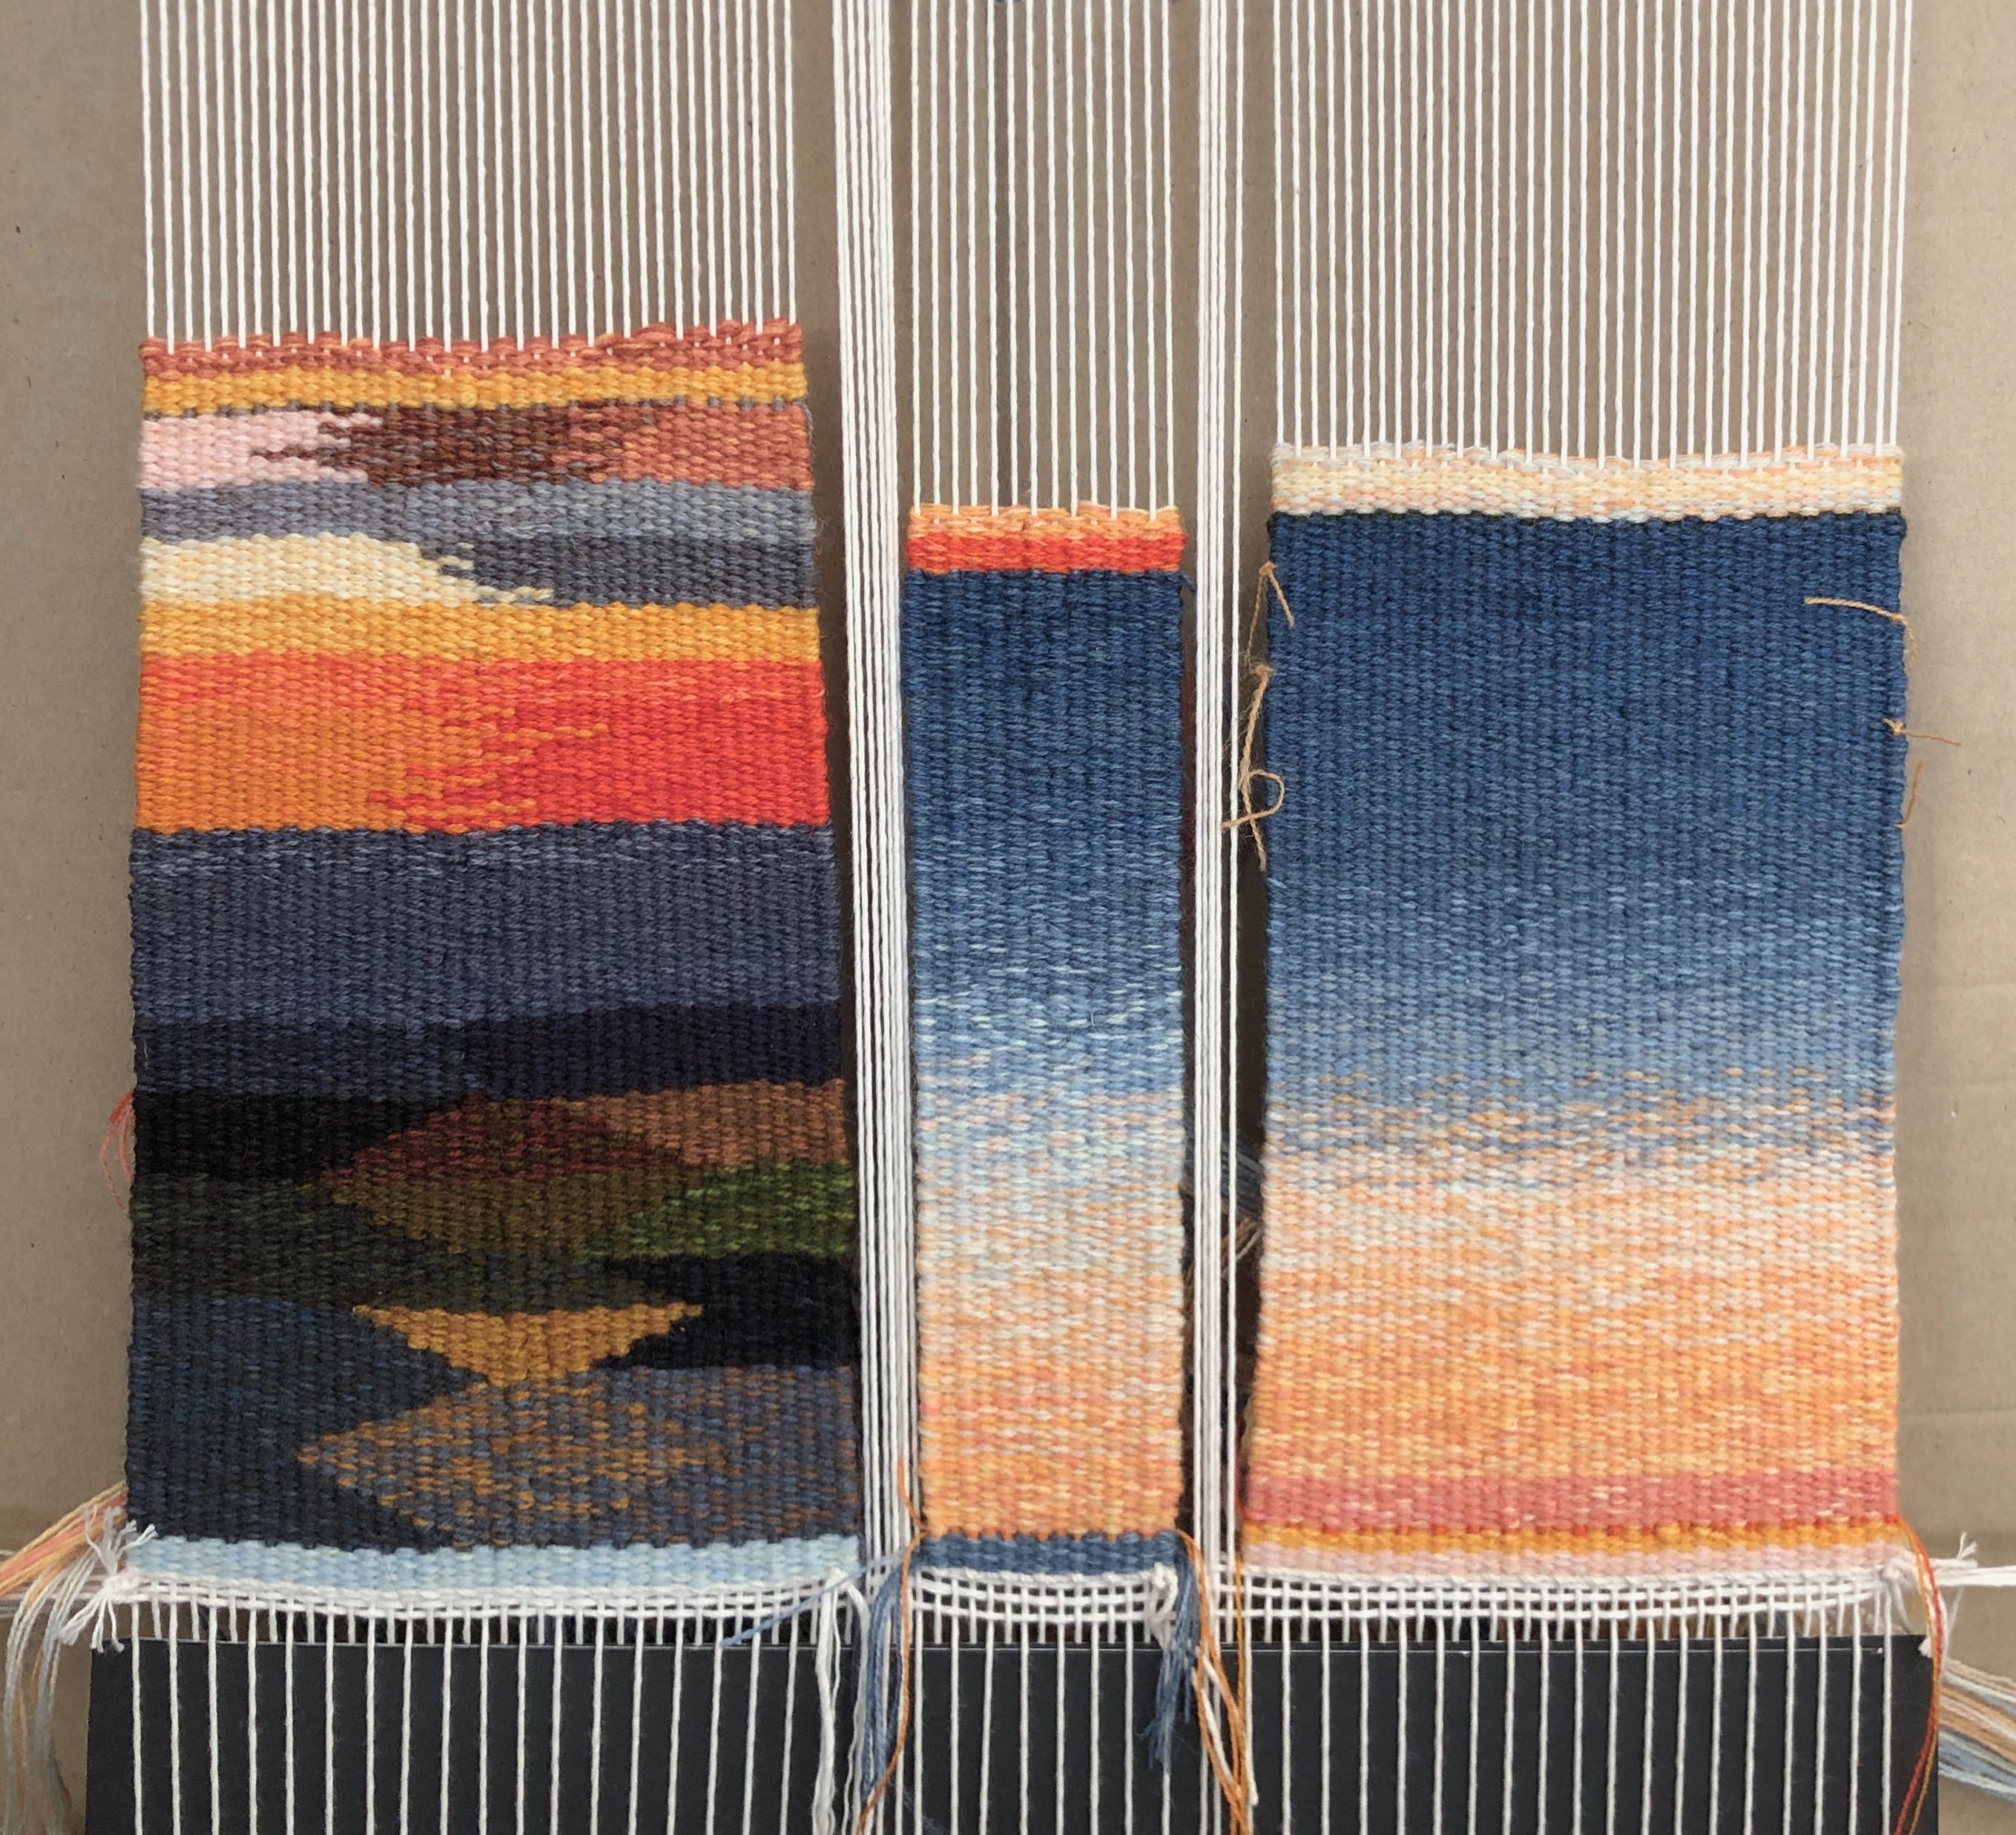
Kati’s sampling experience
Once all the colour sampling was done, I made what I call a ‘sketch sampler’. This had a dual purpose. One was to see how the colours interacted with each other on a larger scale. The other was to test out weaving a hem on a shaped tapestry because at the time we were discussing and testing various finishing methods.
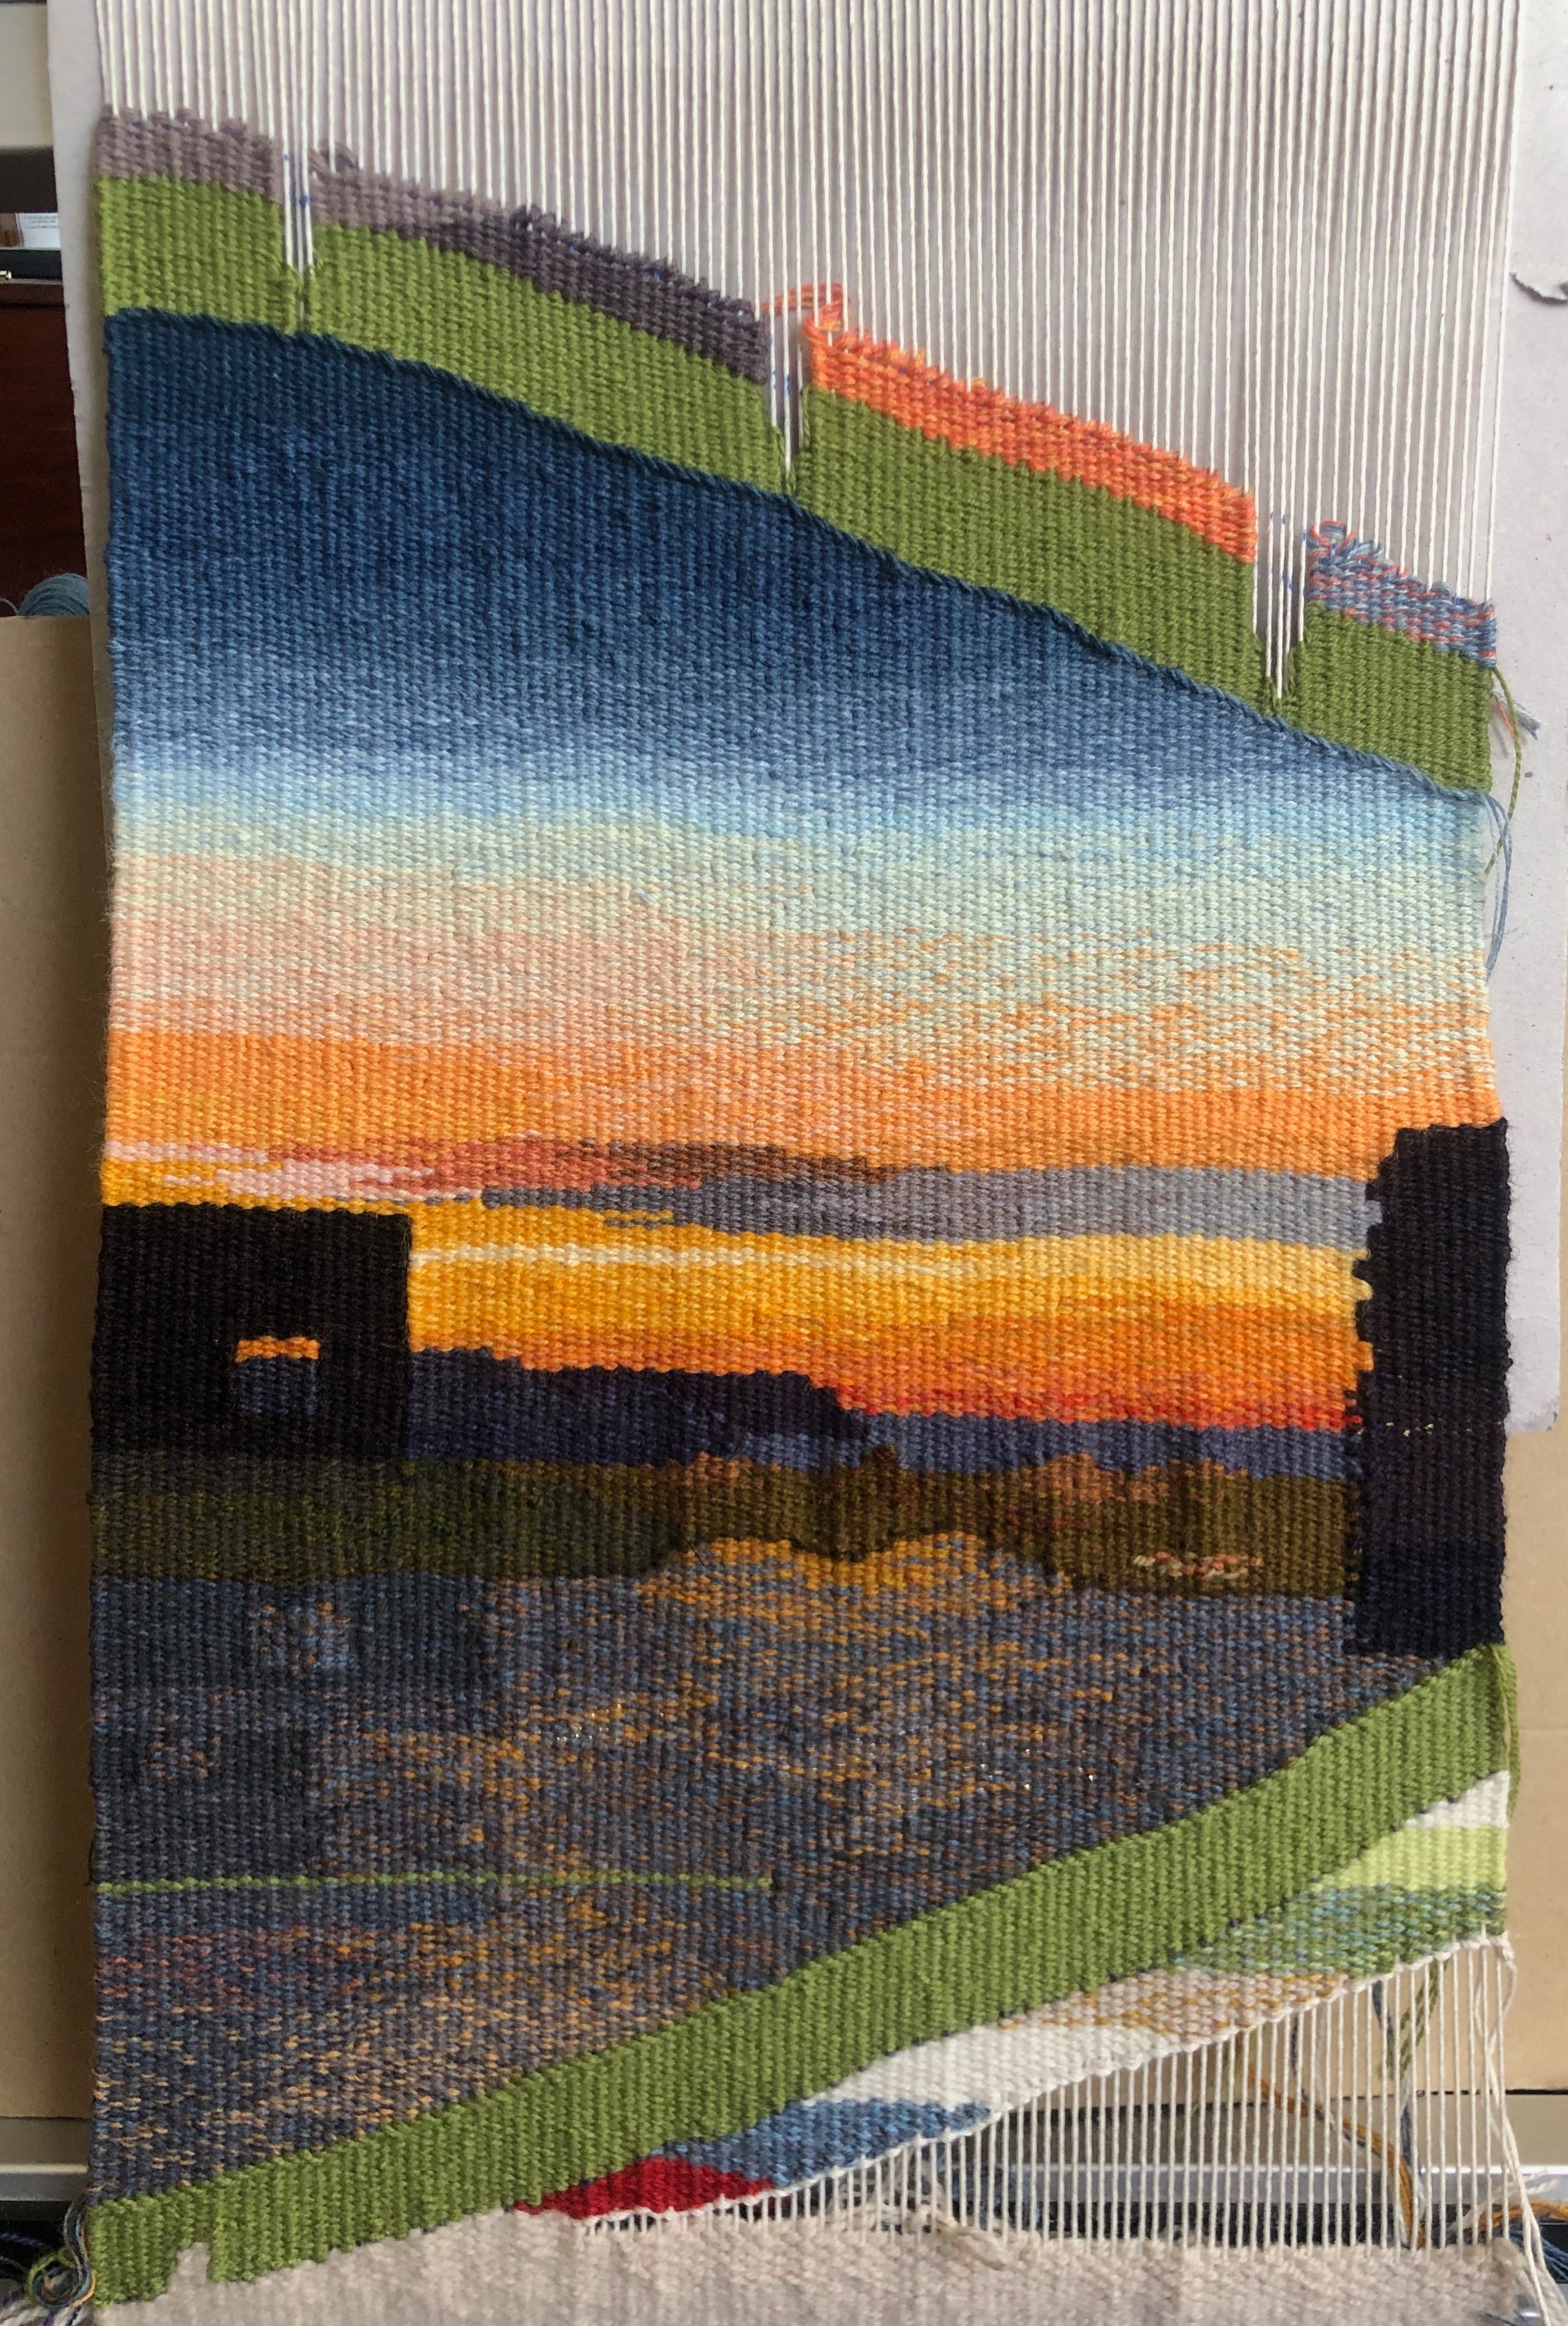
I found this a useful exercise as it helped me to fine-tune the colours more, e.g. I changed the foreground water and the abbey shadow to be a bit darker and the distant headland to be a little lighter. The hems with darts were less successful. Although the curve was gentle, as in my actual tapestry, I found the hem too bulky.
Once the weaving started and following discussions with my neighbours, further minor changes to the blends were made to harmonise the ‘neighborhood’ tapestries.
I made another small sampler to practise the transitions on the sky from orange to dark blue. I was looking for a smooth transition. Towards the top, the blends were so similar that I made markers on the sides to help identify them on my notes (I give each bundle a code for shorthand). Because this was a sampler, the transitions happen in quicker succession than in my tapestry. As I already knew the blends, it was relatively easy to transition by introducing one strand of next colour while removing a strand of the current colour. The trickiest part was moving from light orange to very light green/blue. I wasn’t totally happy with my first attempt. I needed to add light blue so I squeezed a narrow sampler between the two that I had already done.
In conclusion, I have a box full of samplers labelled and referenced against my notes. Often an old sampler will help me refresh my memory when starting a new project, but I doubt I will ever reach a point where I don’t need to weave a sampler, or two.
I hope you have enjoyed reading about our sampling experiences. It would be lovely to hear your views on sampling in the comments section. Happy sampling, Kati.
Thanks very much Tani! The Weaversbazaar yarns really lent themselves to the graduations in colour of the sunset sky. I think it might work well to add in a strand of silk or mercerised cotton to get an actual glow in some sections, although I didn't actually do this in my piece as I was sticking to our colour plans for the group as a whole.
A very interesting read! As a somewhat reluctant sampler, I have also come to appreciate the value of sampling more and more. Perhaps it is a sign of being a little more confident and also experienced that rather than just focusing on a straight weave I now want to try to achieve different effects and sampling ends up being a quicker alternative to the frustration of weaving something you are not happy with and then want to unpick!